Hi I’m Alex and I love making shields!
I decided to make GIn2024 a foam shield that they could use on Fantables or maybe just to hang on someone’s wall. In this blog piece I’m going to show you how to make your very own shield!
Ingredients and Equipment:
- Foam: I used a combination of simple foam floor mats from B&Q and cosplay foam from Poly Props Ltd. The floor mats are cheap and easy to get hold of and makes a great base for the shield. The cosplay foam was used for finer details and thinner sections.
- Box Cutter and Knife Sharpener: To cut the foam to shape, you need a sharp box cutter.
- Cutting Mat: Safe mat for you to cut the foam on so you don’t damage your table.
- Glue: You can use simple super glue for this whole project but I recommend, if you can, to use contact cement for the foam. Contact cement is a super strong glue that only sticks to itself which makes it easier to control. I used super glue for much smaller pieces and precision gluing and then I used fabric glue for sticking on the back.
- Paint and Brushes: Because of how flexible the foam is; you should use a flexible paint to match. You can use regular acrylic paint, but you may find that this cracks over time and repeated bending. I used Hexflex paint by Poly Props as this is specifically designed for foam and is highly flexible. I used their black primer, their colour and metalics range and their clear primer to finish. For brushes, you can again use any brush you have, but the higher the quality of brush you use, the better finish you’ll get. All of the Hexflex paints are water soluble so you can wash it all out of your brushes whilst its wet.
- Paper, Pens and Scissors: You may need the paper for making a template (depends on your complexity and ability to draw circles!), pens for drawing on it and I’d suggest permanent markers for marking the foam and scissors for cutting out the template.
- Masking/Painters Tape: This is used during the painting stage to protect areas. Painters tape is preferable as is isn’t as sticky and won’t rip off paint underneath.
- Dremmel and Safety Equipment: This is where the equipment gets more expensive and niche. I have a dremmel because I do a lot of this. If you have one that’s really useful, otherwise you may struggle to get the wood effect I’ve gone with. If you are using a dremmel to sand foam you need to use a mask that filters out small particles. A dust mask is NOT sufficient, foam dust can be really harmful, you NEED the mask to protect your lungs.
- Heat Gun: This tool is similar to a hairdryer but runs a lot hotter. I use this to finish my pieces really professionally and it helps with making the paint look smooth but it’s not crucial.
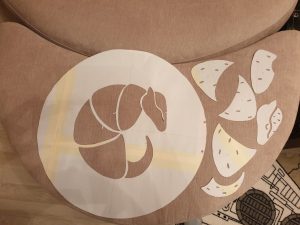
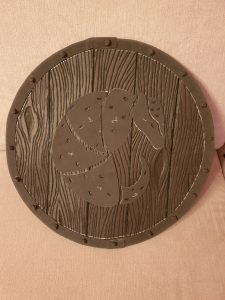
First thing you’ll want to do is make a template. This can be as simple or as complicated as you like. I’ve gone for a complicated armadillo design but you can stick to a simple circle shield if you like!
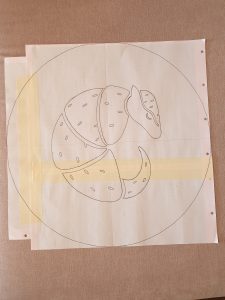
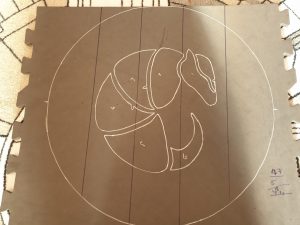
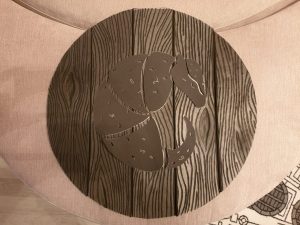
Once you have this, cut out the outer edge and use this to cut out your shield base in the foam mats. Then I used my template to mark where my armadillo centre piece will sit and where my wood planks and wood grain is. At this point I then split my shield into planks to get a realistic wood effect. You don’t need to do this if you want to make things easier, you also shouldn’t do this if you’re not trying to make a wood effect.
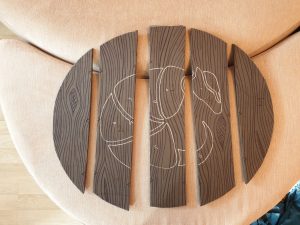
To get the wood effect I use the edge of my dremmel to carve grooves into the foam. This bit is really messy. I sat outside to get rid of the bulk of the foam dust and then showered afterwards cause that dust gets everywhere! Again, you need the correct mask to protect yourself if you are sanding the foam, the dust is really harmful.
Another, easier way to make the wood effect is with a soldering iron or wood burning tool. You can melt the wood grain into the foam to get the lovely groves. Again you need to do this in a well ventilated place with a mask as the fumes from the foam are toxic. This means you don’t need a dremmel and you don’t need to worry about the dust.
If you have separated your wood planks, glue them together now with the contact cement or super glue.
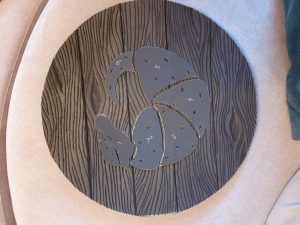
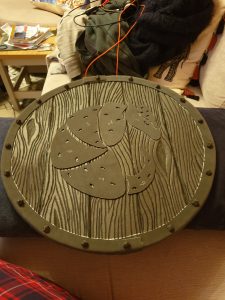
I then cut out my armadillo pieces out of 2mm cosplay foam and stuck them onto the shield using contact cement.
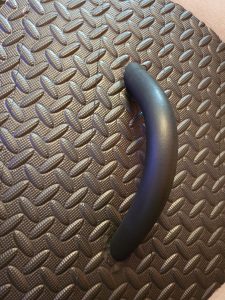
Next I stuck my handle onto the back of the shield. I flattened the area where I wanted to stick the handle using my box cutter and then used a thick foam dowel as my handle.
I then cut a thick strip of 2mm foam to glue round the outside of the shield and then press down onto the front of the shield and glue down. This is where cosplay foam is awesome. It’s really forgiving and easy to stretch to get round corners but also compress to get rid of wrinkles. If you gently press the thin 2mm foam down, you can compress it to prevent the wrinkles in the foam.
Next I took some scrap foam and made some little bolts that I then glued on round the edge of the front face to make it look like my border had been bolted on. I used super glue for this bit because they’re really fiddly.
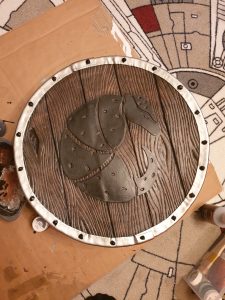
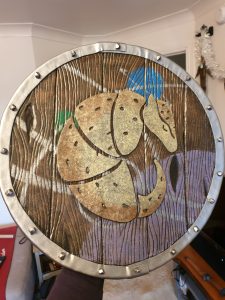
Finally, we get to painting. If you have access to a heat gun, this is where you blast the foam with the heat gun to seal the foam and just get a nicer finish on it. You then should prime the foam so that it takes the colour paint nicer and get rid of any pen marks. Next we do the wood colour. We start with a few layers of a mid-brown colour and then we do the wash. This is a super watered down dark-brown that lets it get into all the gaps of the shield. You need to make sure this dries fully before moving on, otherwise you’ll just take that layer of paint straight off again. Then we do a light-brown with absolutely no water and with very little pigment to give the lovely scratches across the wood. These layers of brown paint give the wood so much more realism and fake texture. You can of course paint this in any colour and at any complexity.
If you’re letting your children paint their own shield, I recommend using acrylics on top of the Hexflex primer and preferably mixed with some of the clear Hexflex primer.
I use a simple metallic silver to cover my border.
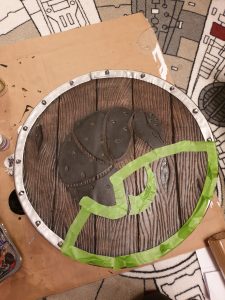
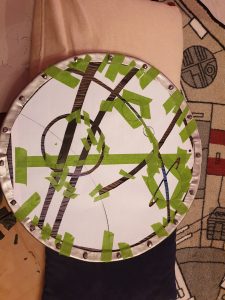
Next I made a second template for the Glasgow In 2024 logo that I would paint onto the background of my shield. This took forever to draw and then cut out and tape to the front of the shield! It was worth it though.
I then mask up the edges of the armadillo and paint the armadillo in gold.

Finally, we do the top coat. I use a watered down Hexflex clear primer and do many layers of it to protect all of the paint work. I ended up doing at least 7 layers, which doesn’t take too long as these layers dry within an hour, particularly if you use a hairdryer to gently speed up the process.
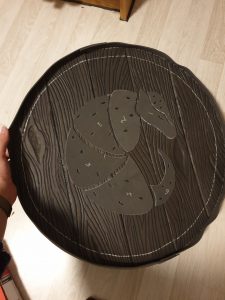
Lastly, I glued on the fur onto the back to finish the shield.
You now have a wicked shield! I like to hang mine on my walls, but you can use these for gently sword fights. The foam is very durable and forgiving. You can make these as simple or as complicated as you like, just let your imagination run wild!
If you like my cosplay, you can follow me on Instagram @alittlebirdycosplay where you can find all of my creations!
This article was brought to you by Alex Wren, Social Media Area Head in Promotions Glasgow in 2024. Alex lives in the Glasgow area and is currently doing a PhD in Biomedical Engineering. When she isn’t being our fabulous overlady of social media, she enjoys cosplay, running and playing Dungeons & Dragons, video games and loves board games. This Rookie’s Guide to Games Series is her excuse to try new games and expand her collection. You can find more posts from the series HERE.
We are the Bid Team for Glasgow in 2024 – A Worldcon for Our Futures. We are part of the vibrant Worldcon community. We would love to welcome you to Glasgow and the Armadillo Auditorium for the 2024 Hugo Awards. Please consider supporting us.