I recently found a pile of Shrinky Dinks paper at the bottom of a drawer and thought to myself, “Oh, the possibilities!” No doubt this is the exact same thought I’d had when I put it in the drawer to begin with several years ago, but this time I was determined to make something with it sooner rather than later and so I left it out and got to work printing some templates for tracing.
These are not strictly necessary—you can draw straight onto the paper, but printing templates has its benefits. Firstly, I’m not that good at drawing by hand. Secondly, it makes it easier to resize or flip the image if your first attempt comes out a little too big or too small or even back to front, which is what happened with my first attempt.
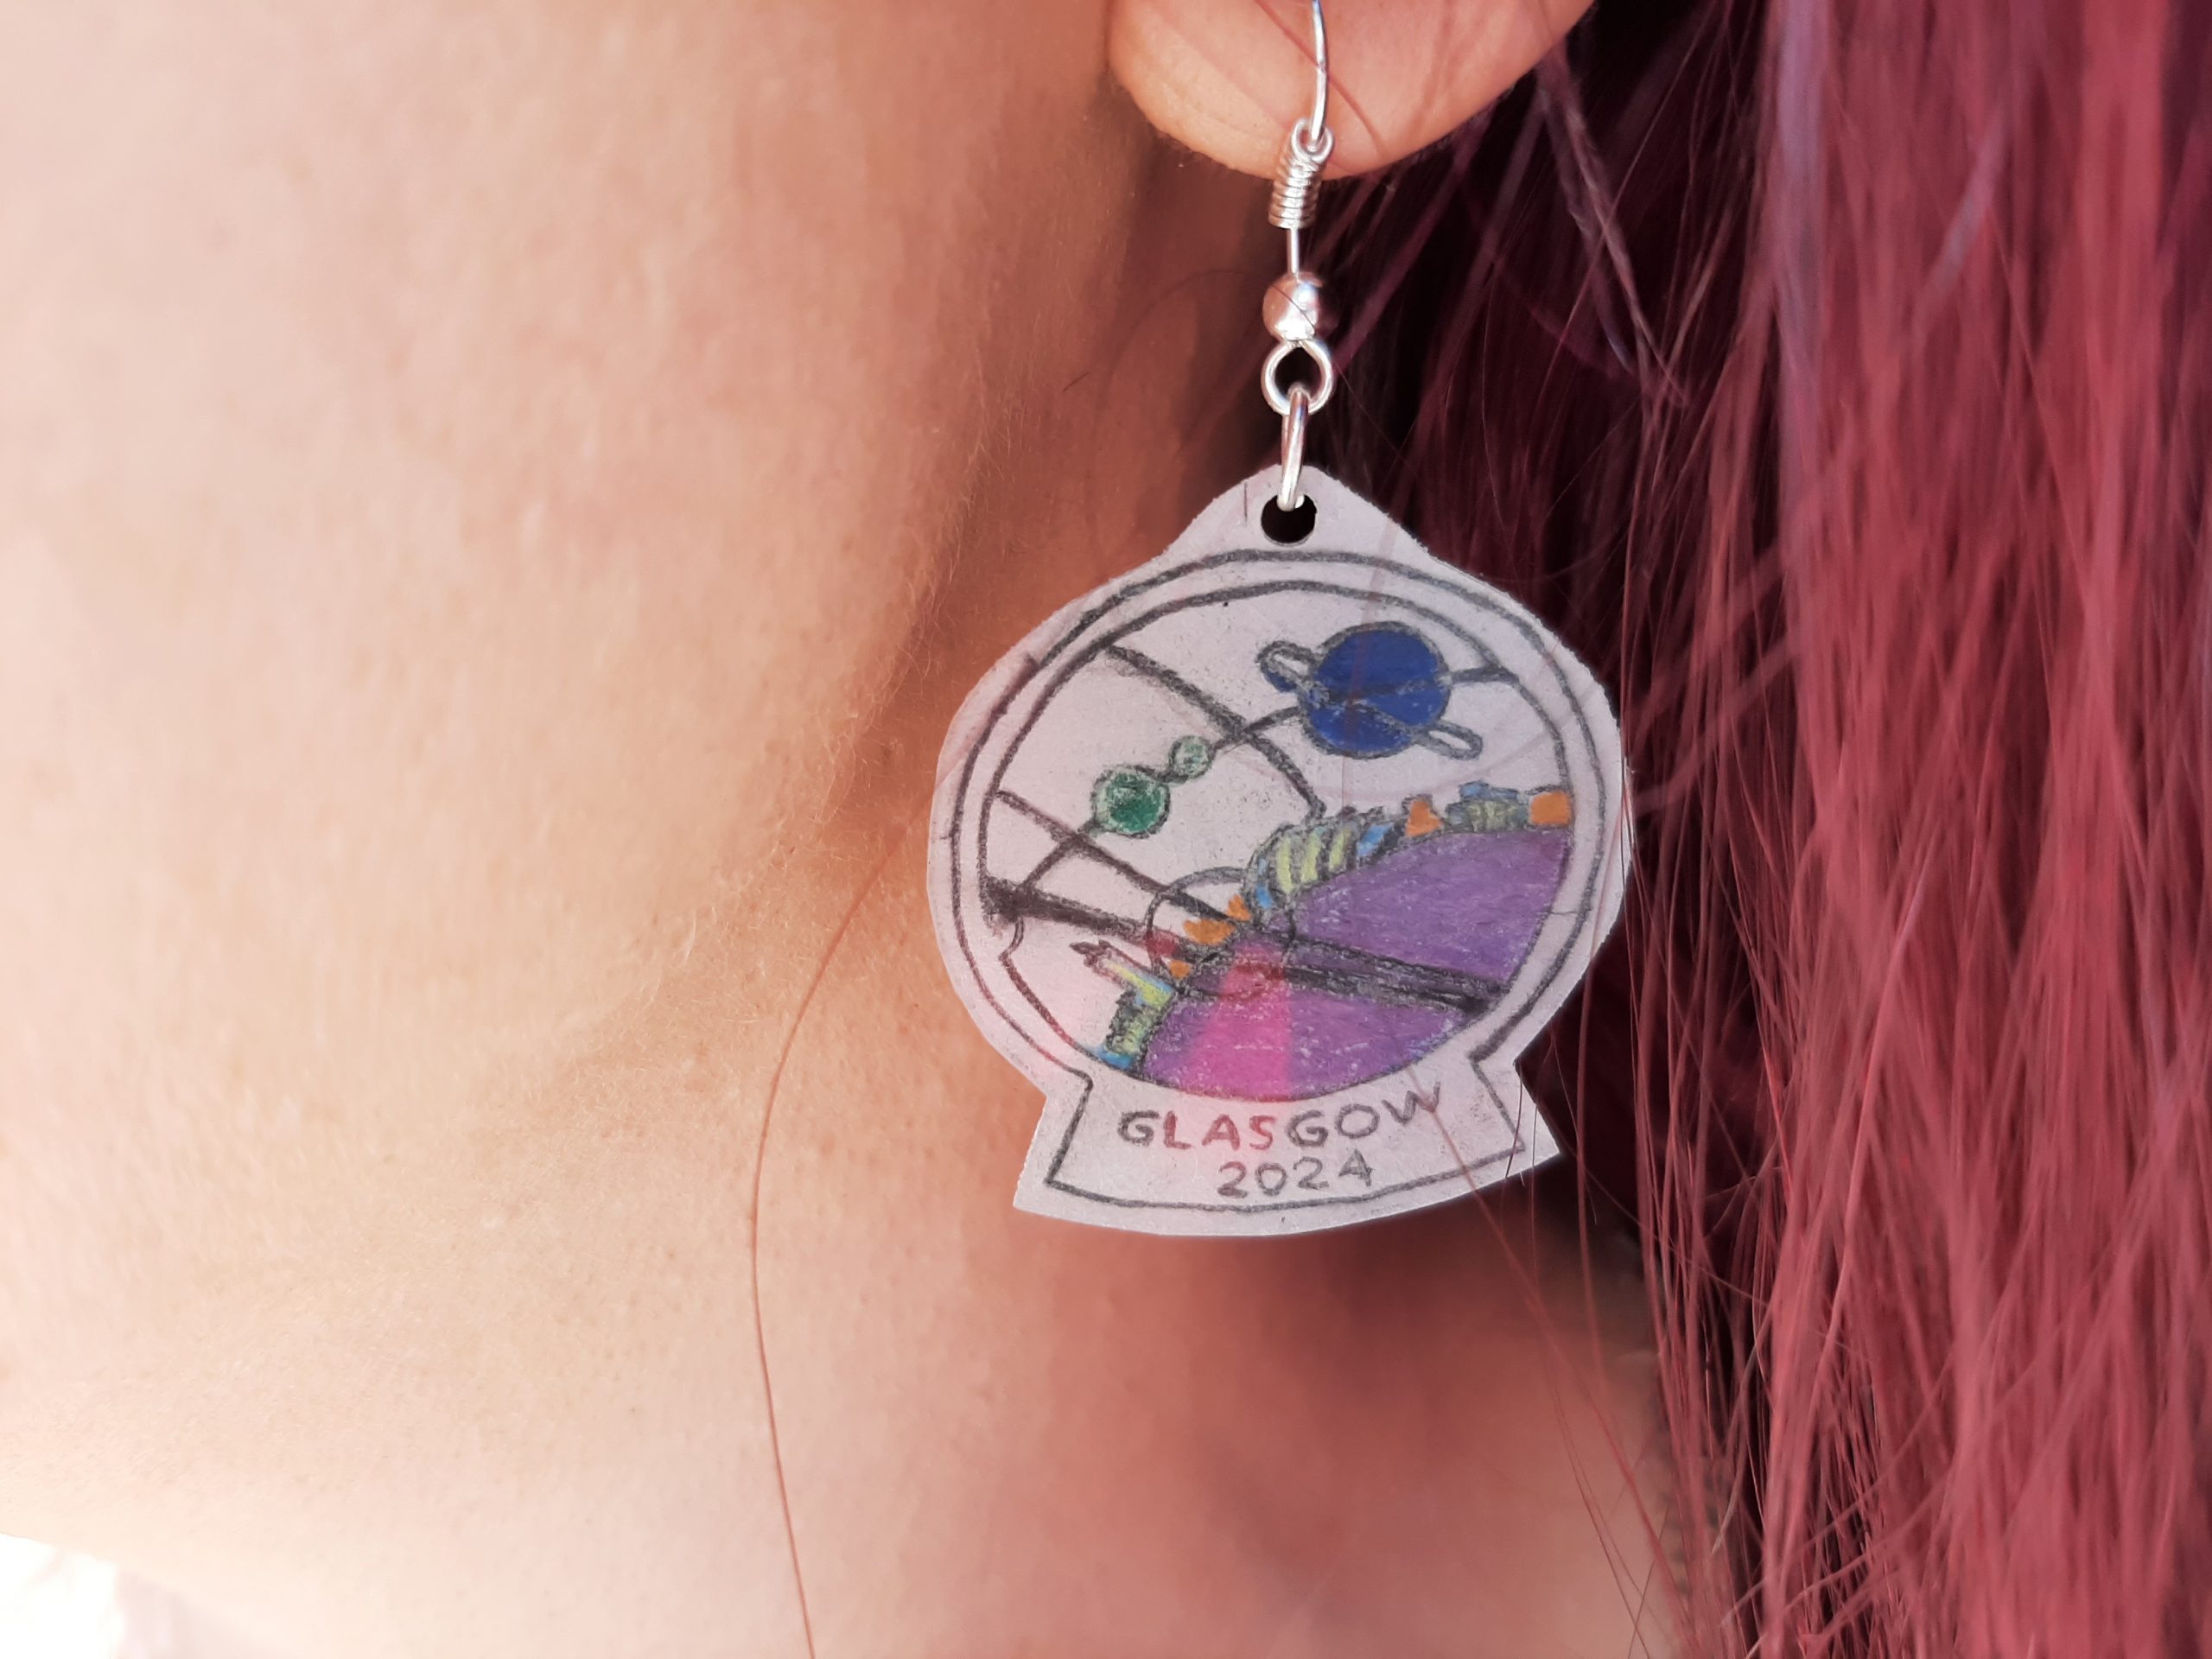
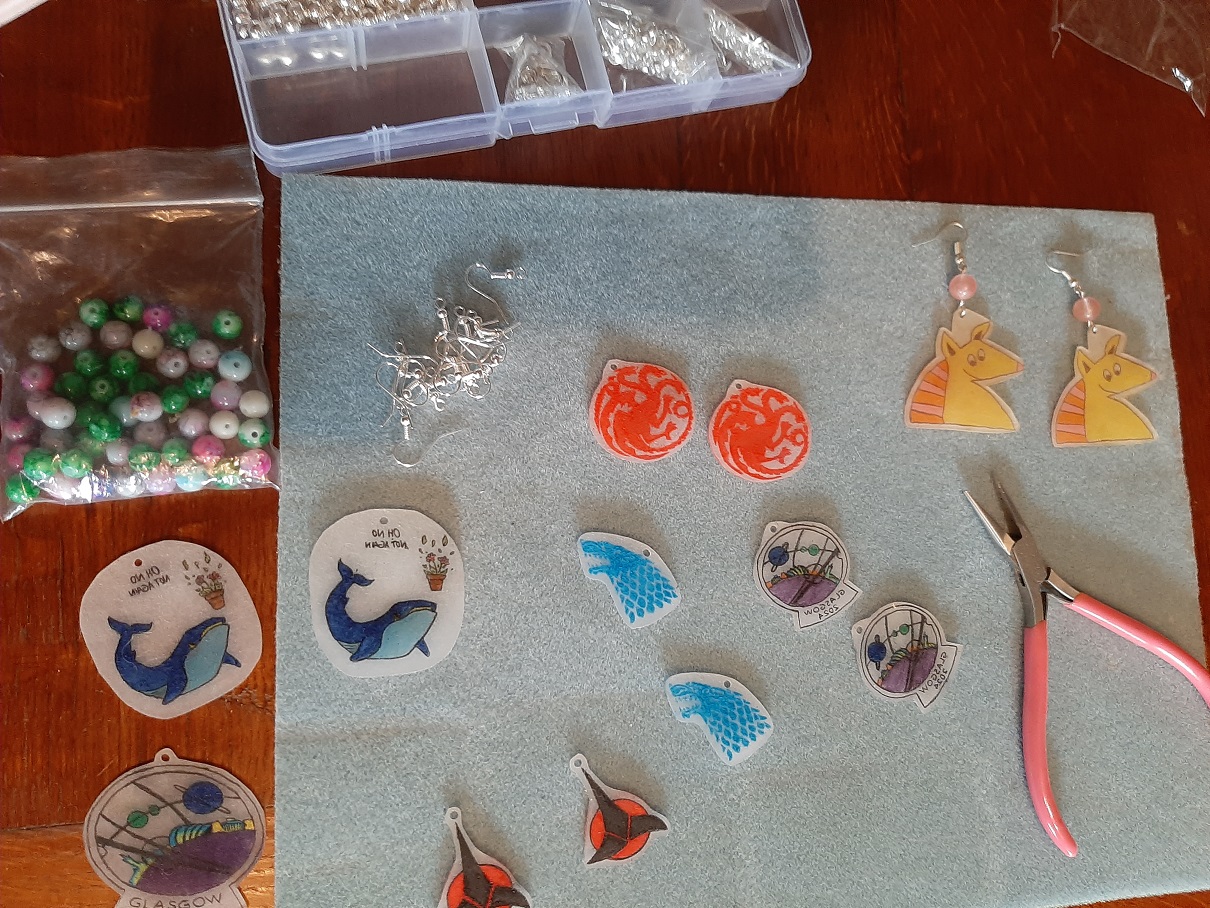
I wanted to make earrings of the Glasgow in 2024 logo, so I printed that along with an armadillo drawn by Sara Felix, our bid associated artist. You can download a PDF of the colouring page here.
These are the materials and tools you will need to play along:
- Shrink plastic sheets
- Hole punch
- Scissors
- Coloured pencils or markers
- Printer
For earrings:
- Round nose pliers
- Hook ear wires
- Jump rings
To make a necklace:
- Round nose pliers
- Jump rings
- Lobster clasp
- Non-stretch nylon cord
- Beads (optional), Crimps (optional)
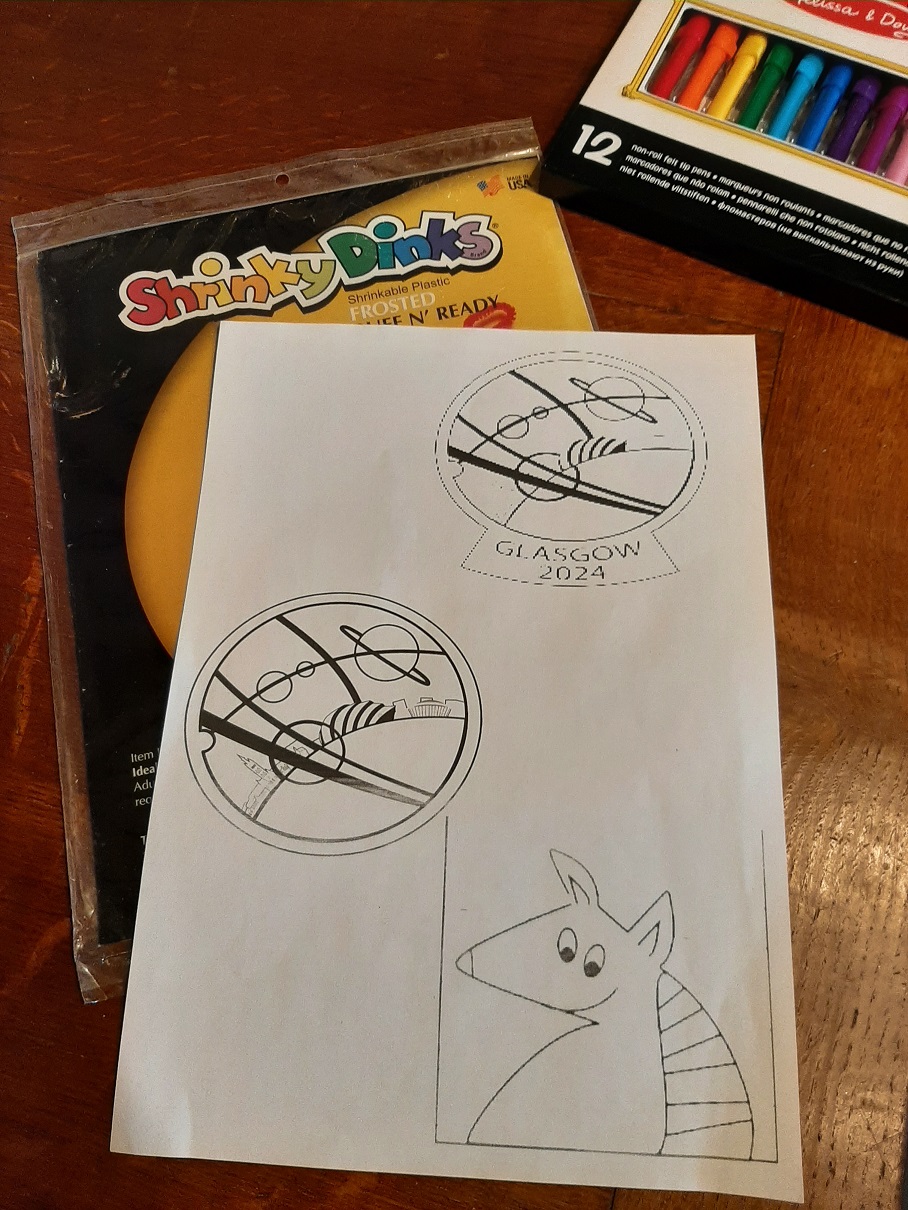
I printed these templates too big by the way! I also traced them onto the rough side of the paper as it had a better grip. The colour from the markers was a little weak, so I ended up using coloured pencils. Unfortunately, I forgot that the finished product will be shiny side out (this is my personal preference), and so I should have flipped these images on the computer before printing them as the writing ended up being back to front.
Once you have drawn or traced your pictures and coloured them in, you need to cut them out. I would recommend overlaying your earrings when you cut them so that the shape matches and the hole is in the same place for both earrings. Punching before you bake them is really important as the plastic will be too hard to punch afterwards. It is important that the hole is close to the top, as you’ll be threading a jump ring on there later and if the hole is too far down it won’t fit.
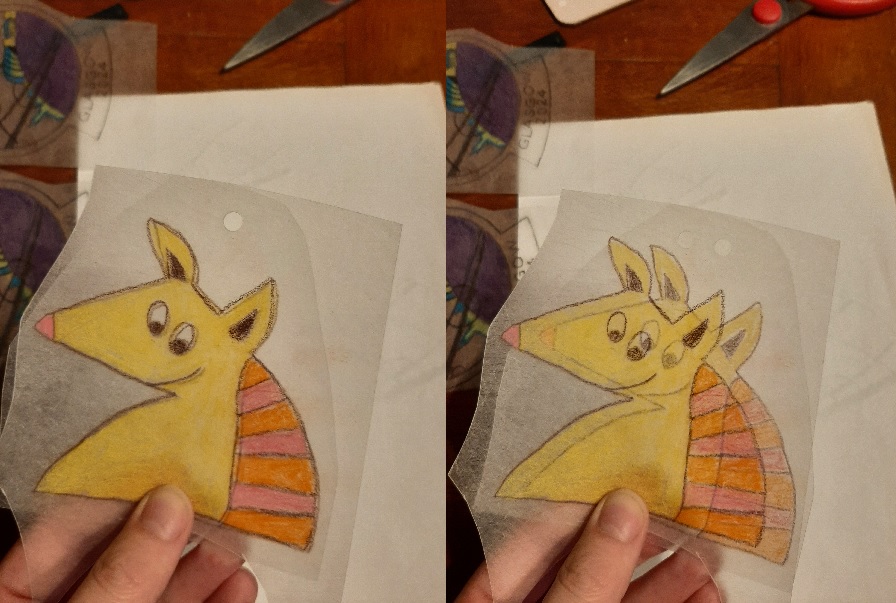
Once the pieces are cut out, place them on a baking sheet and bake them in the oven, where they’ll shrink to about a third of their original size.
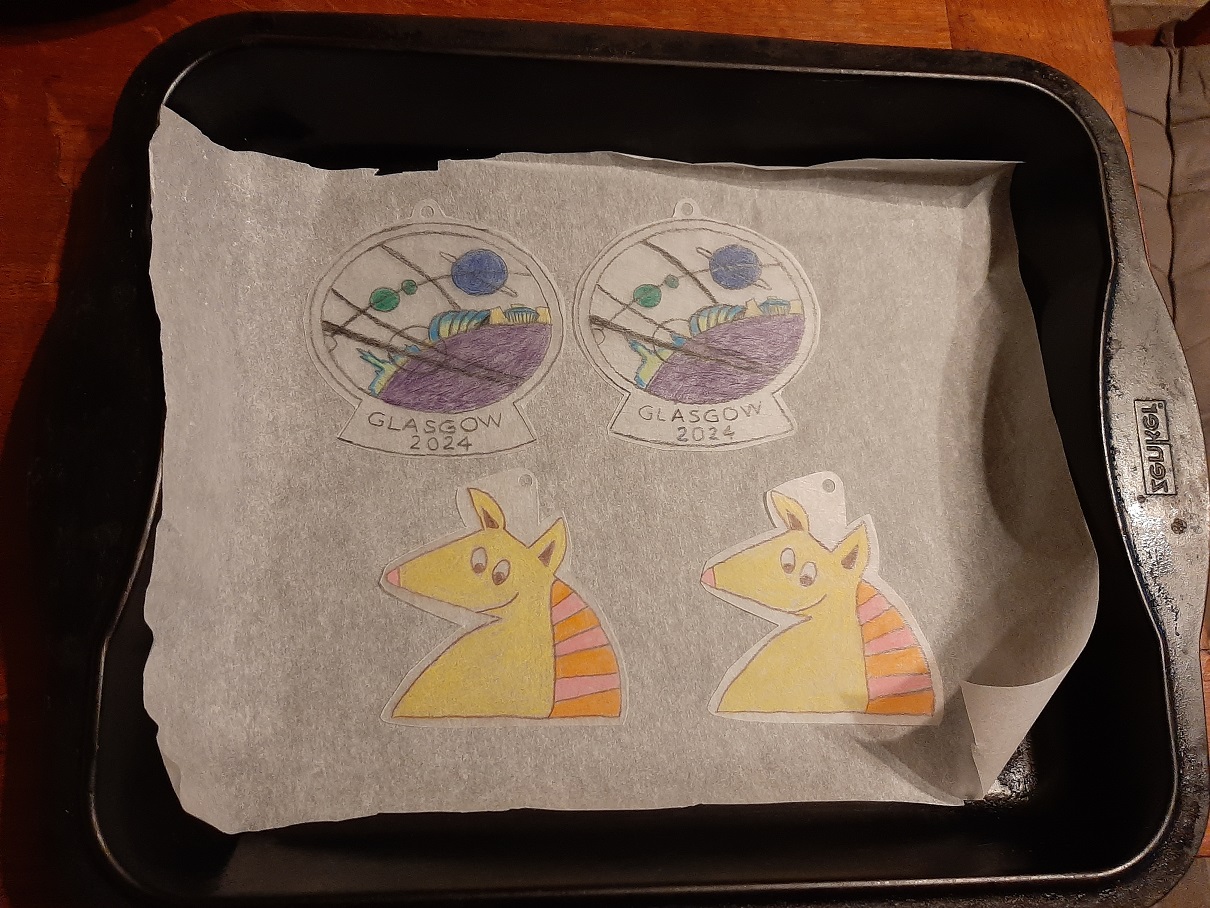
Baking instructions will vary depending on your plastic sheets so please follow those instructions carefully. Mine said to bake for 1-3 minutes at 160°C. My oven is old and inefficient so it actually took twice that length of time, I also panicked when they started to curl up and took them out early, which didn’t help! It is completely normal if they curl up into a little ball while baking, don’t take them out of the oven until they have completely flattened themselves out again.

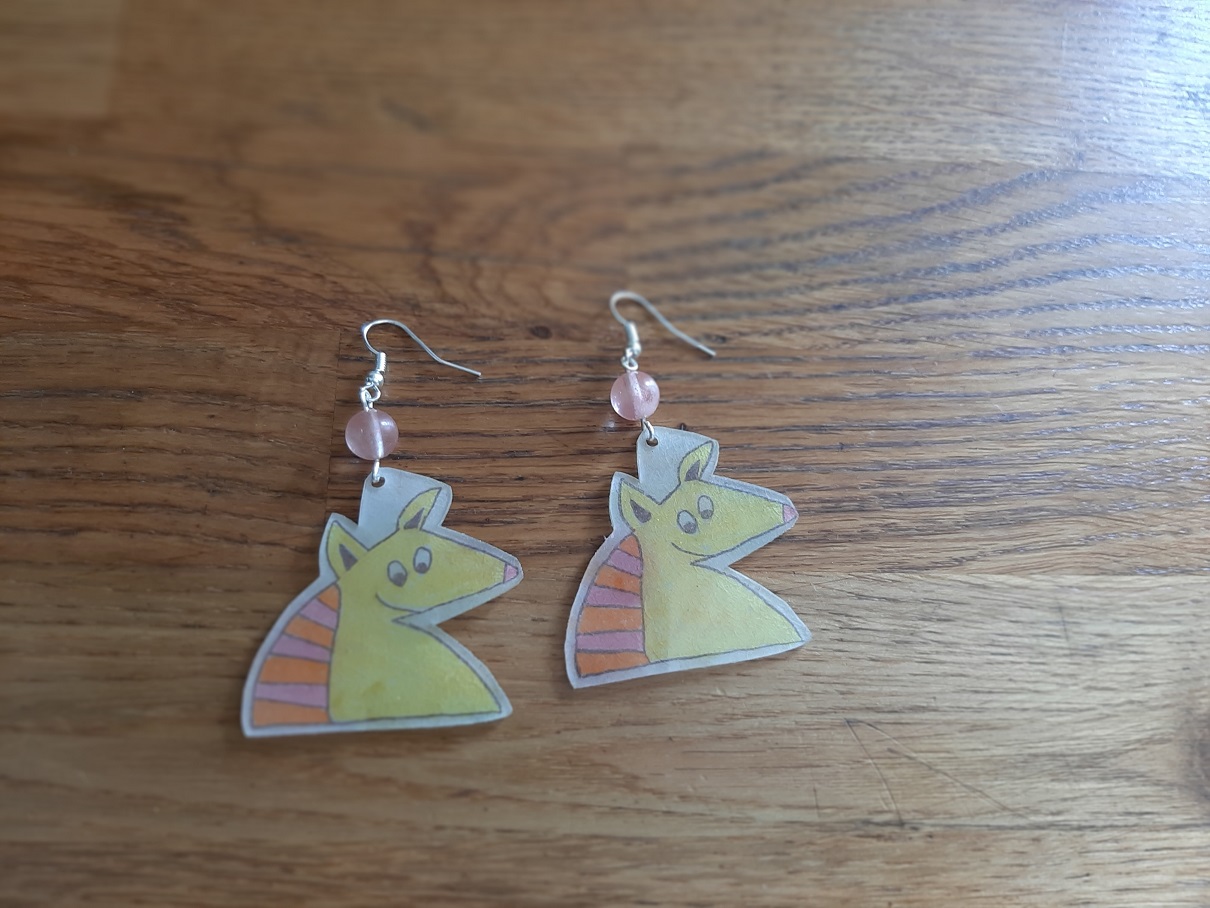
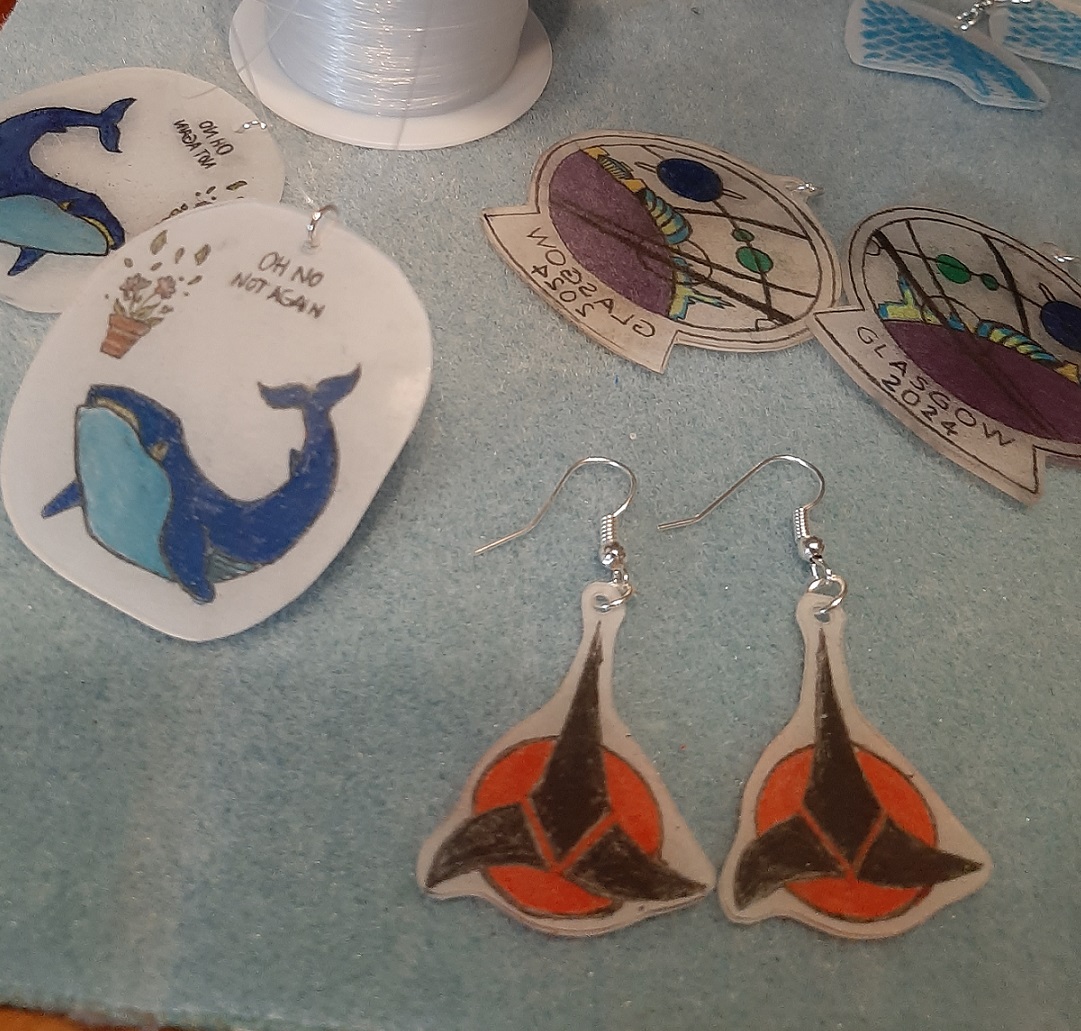
I think my armadillo earrings turned out pretty well!
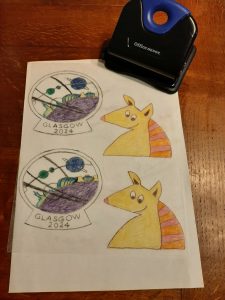
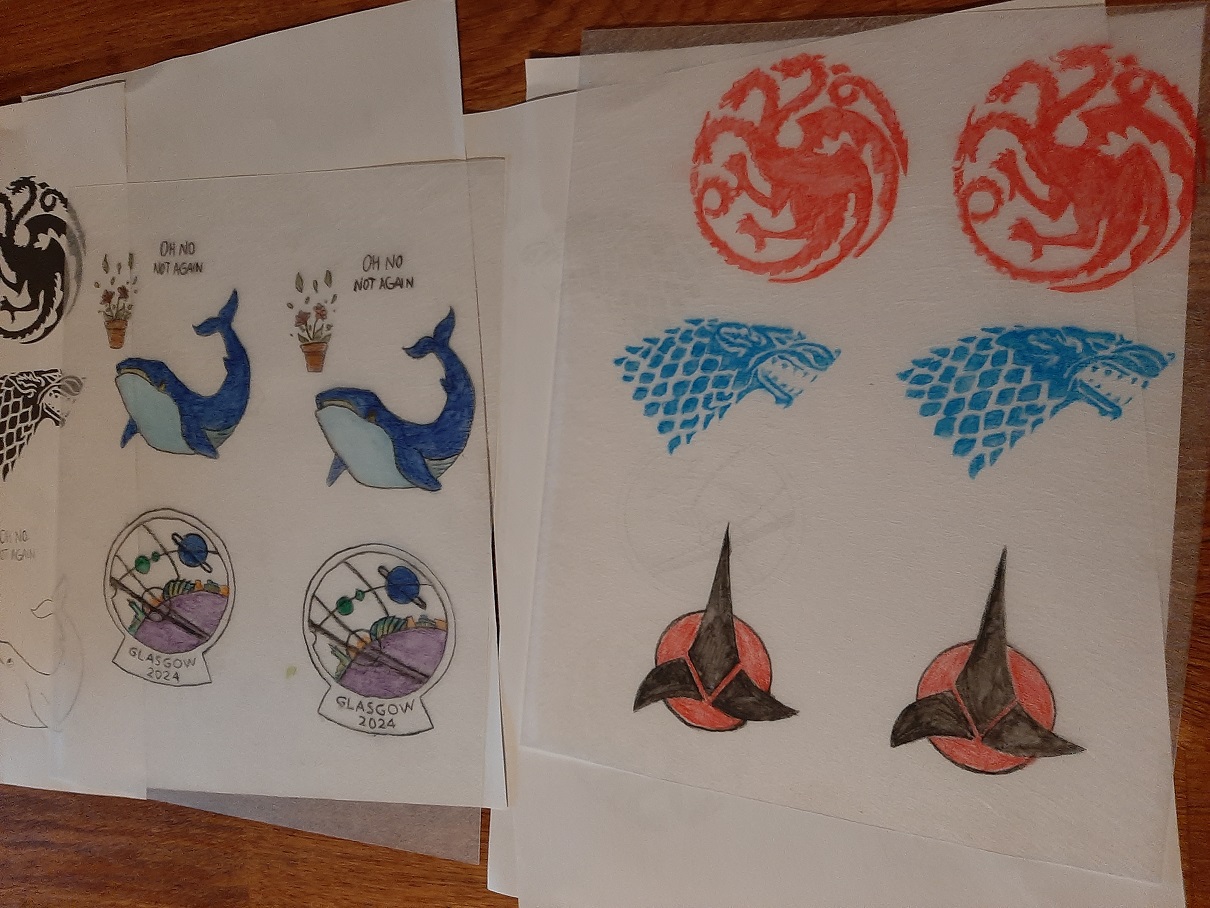
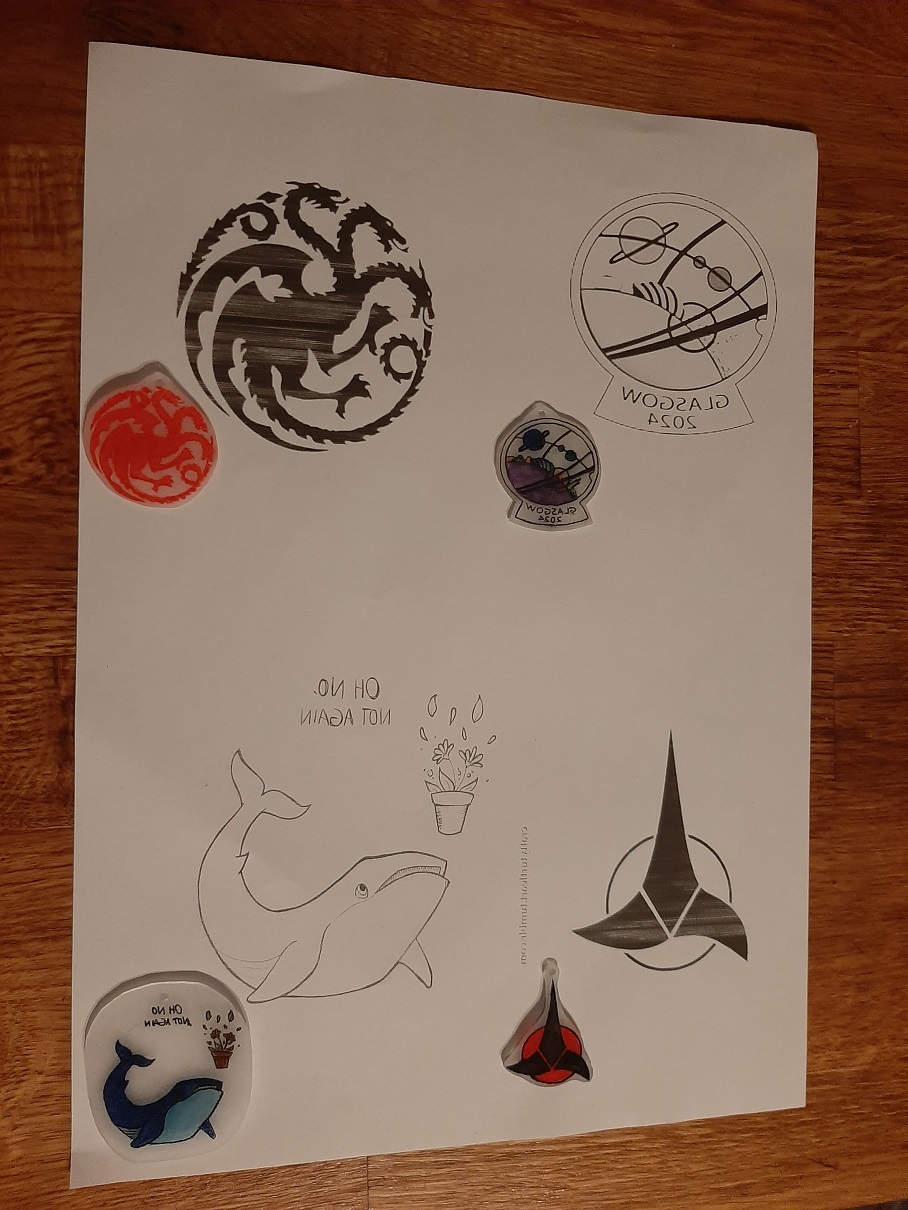
But the Glasgow in 2024 logo was way too big and back to front so I went and printed a new template where I sized it a little smaller and flipped it. I also printed some Game of Thrones and Star Trek themed templates to trace. Finally, I added fan art of a space whale from The Hitchhiker’s Guide to the Galaxy.
These all came out a much more manageable size apart from the space whale, which I decided to make into a necklace rather than earrings. Here is a picture to show how much they shrank in comparison to their template:
That’s when I got out the jewellery supplies!
I used a relatively inexpensive jewellery making kit I found online that came with the jump rings and ear wire hooks I needed. That and pliers and you should be good to go!
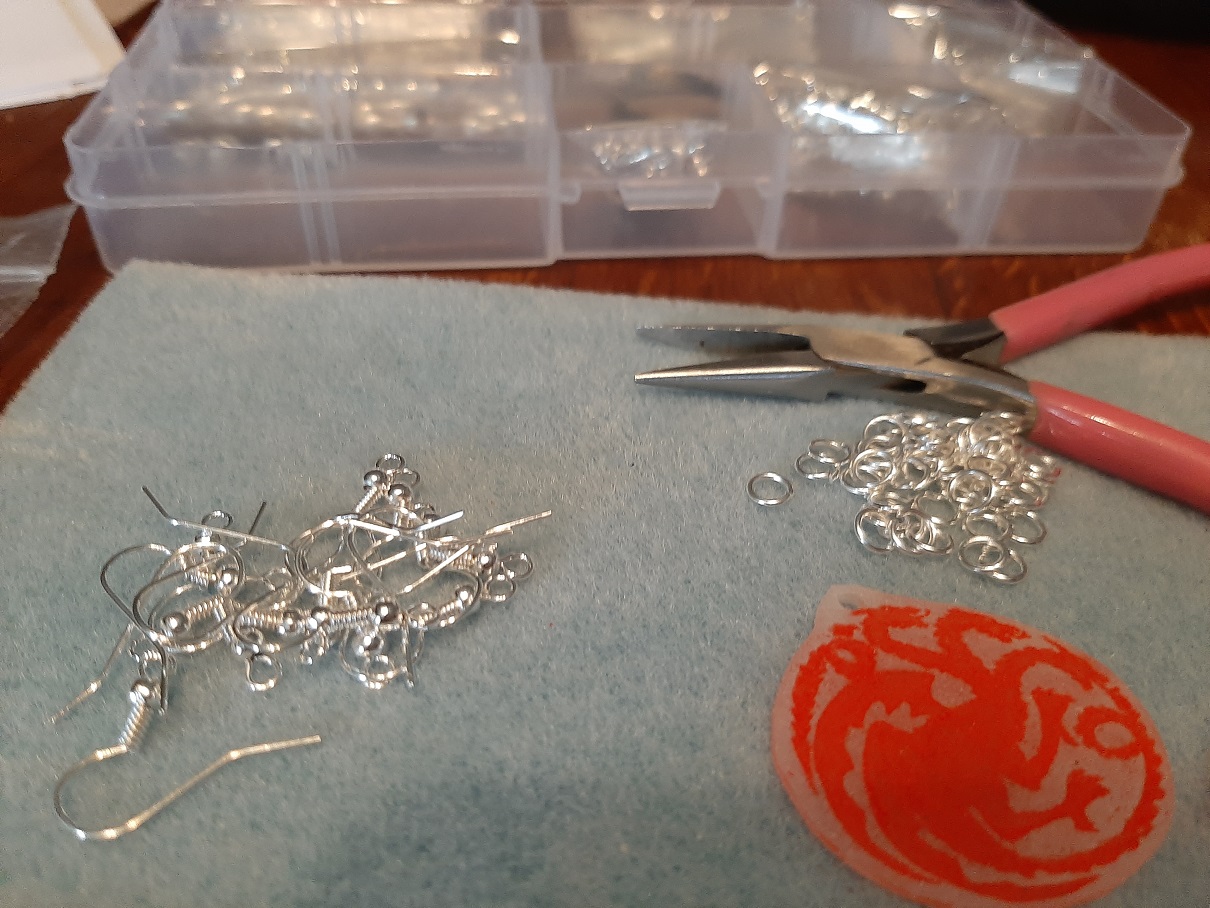
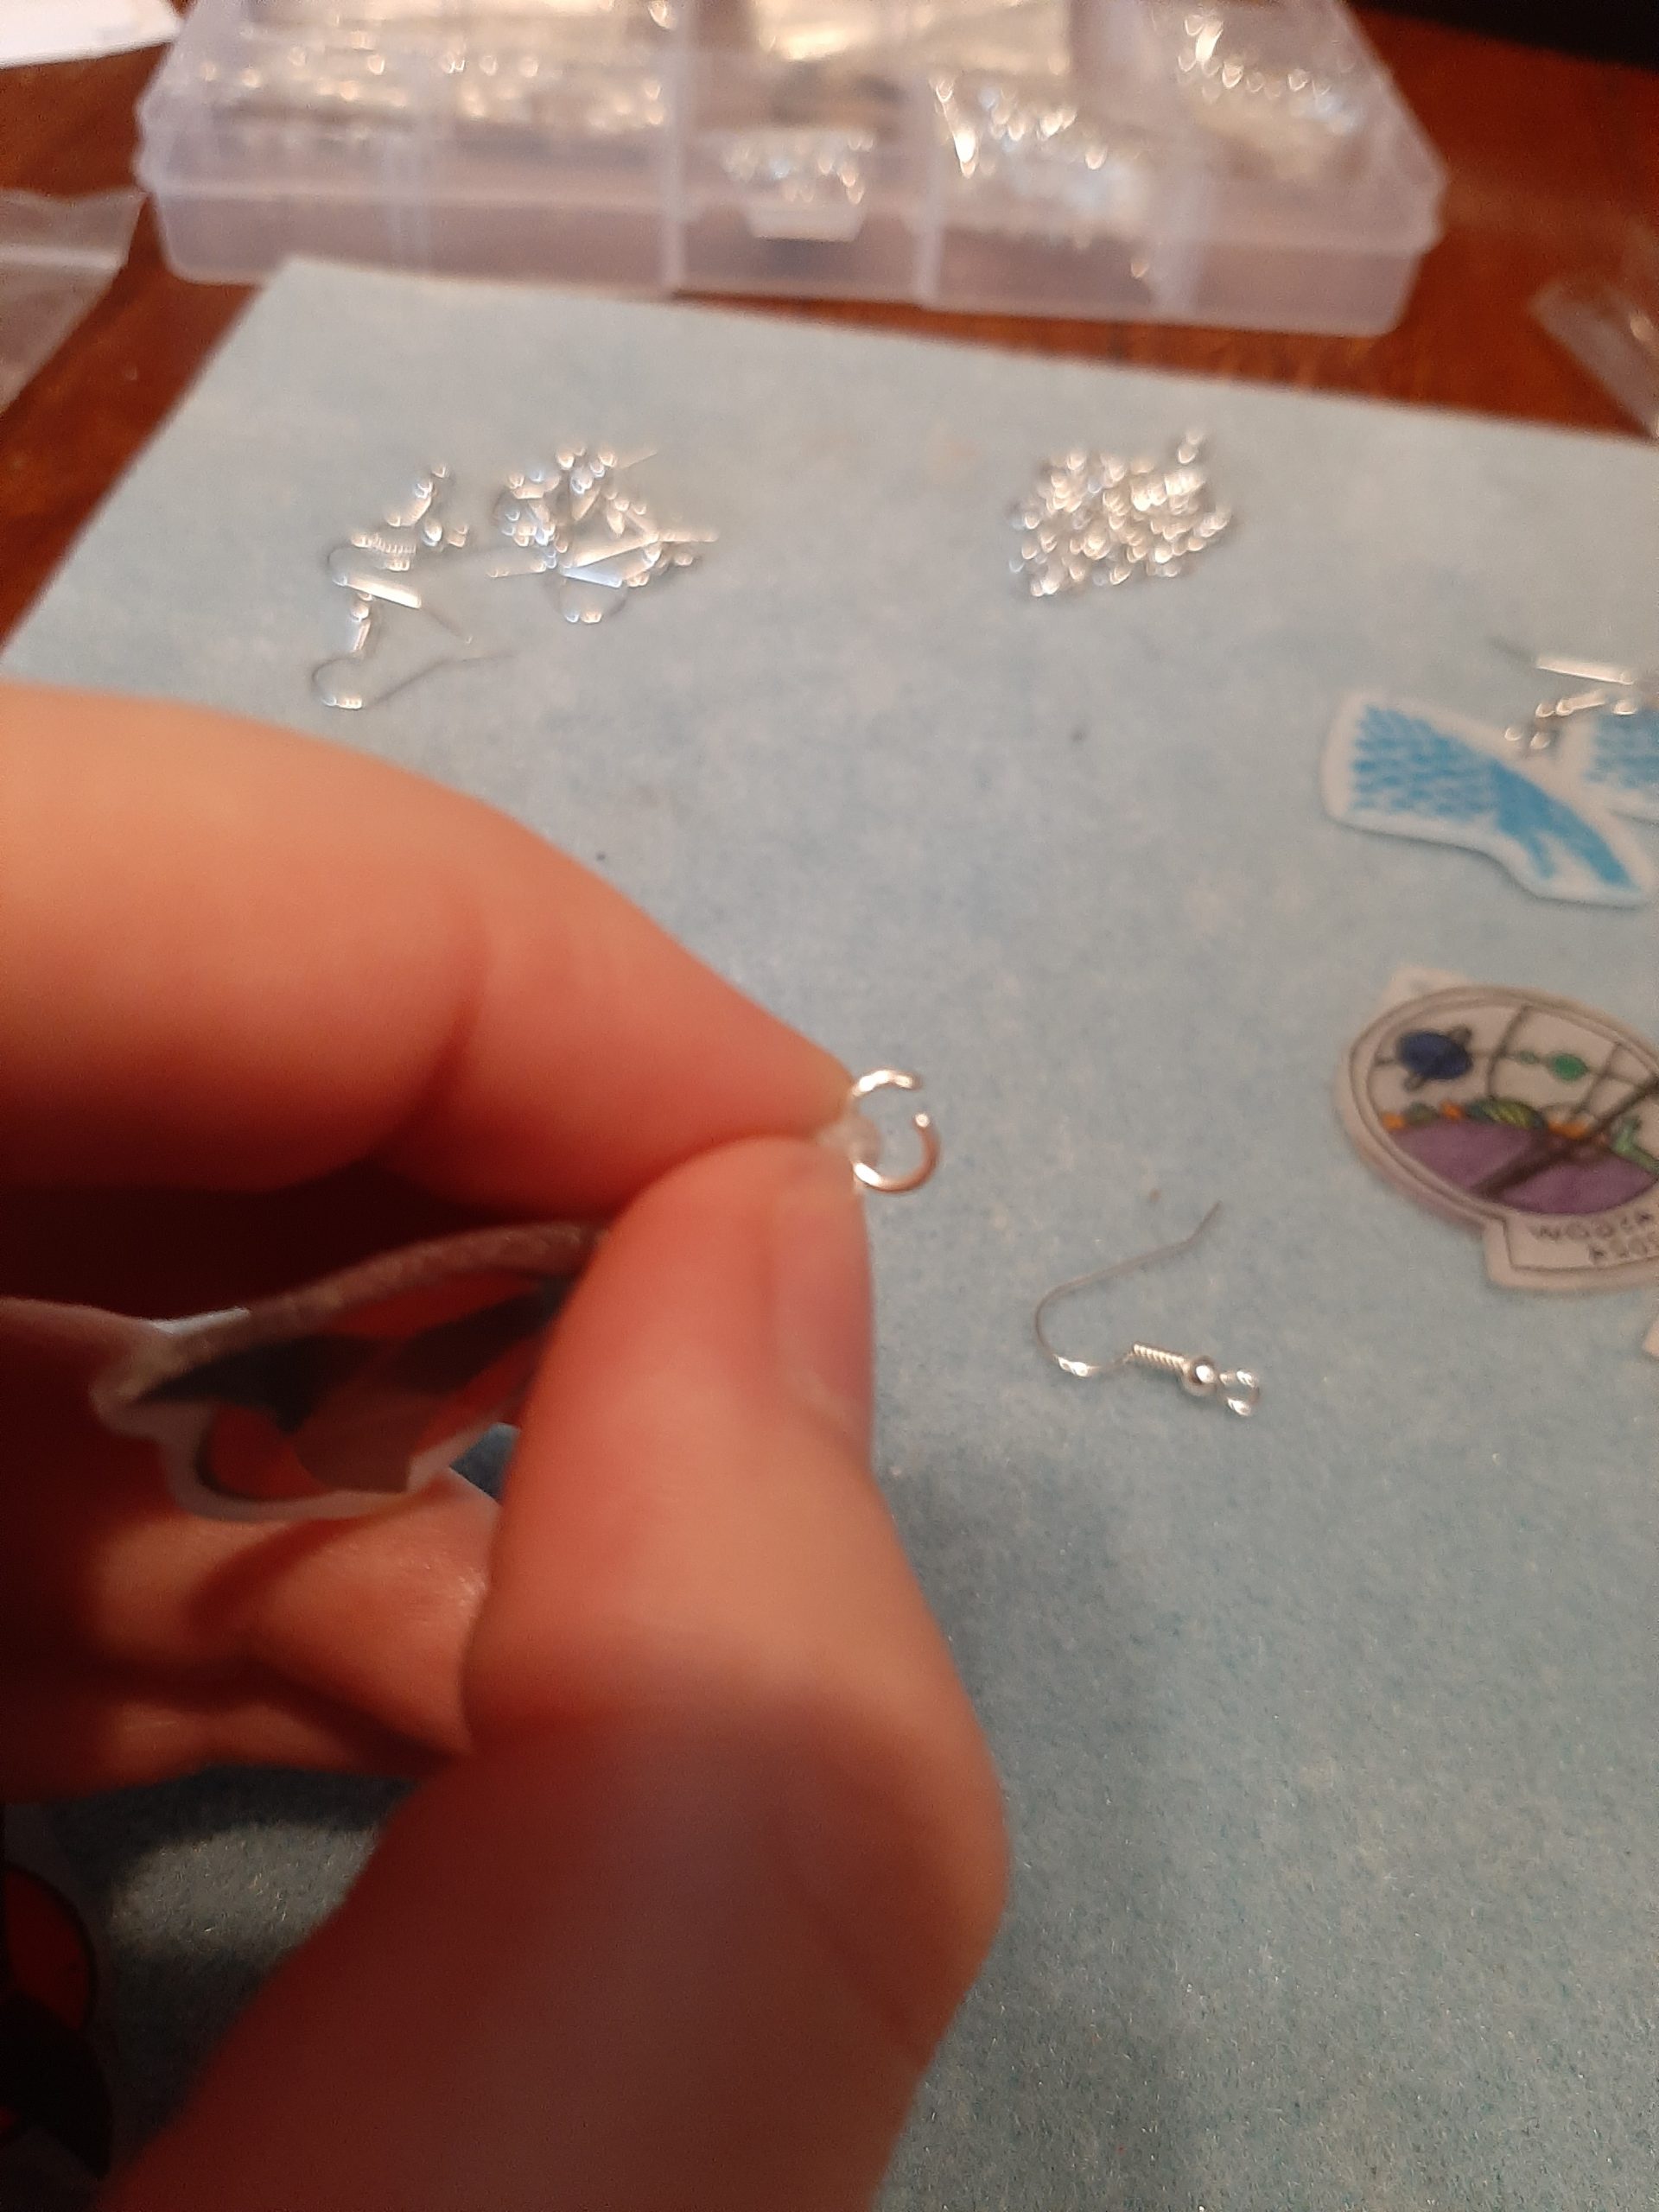
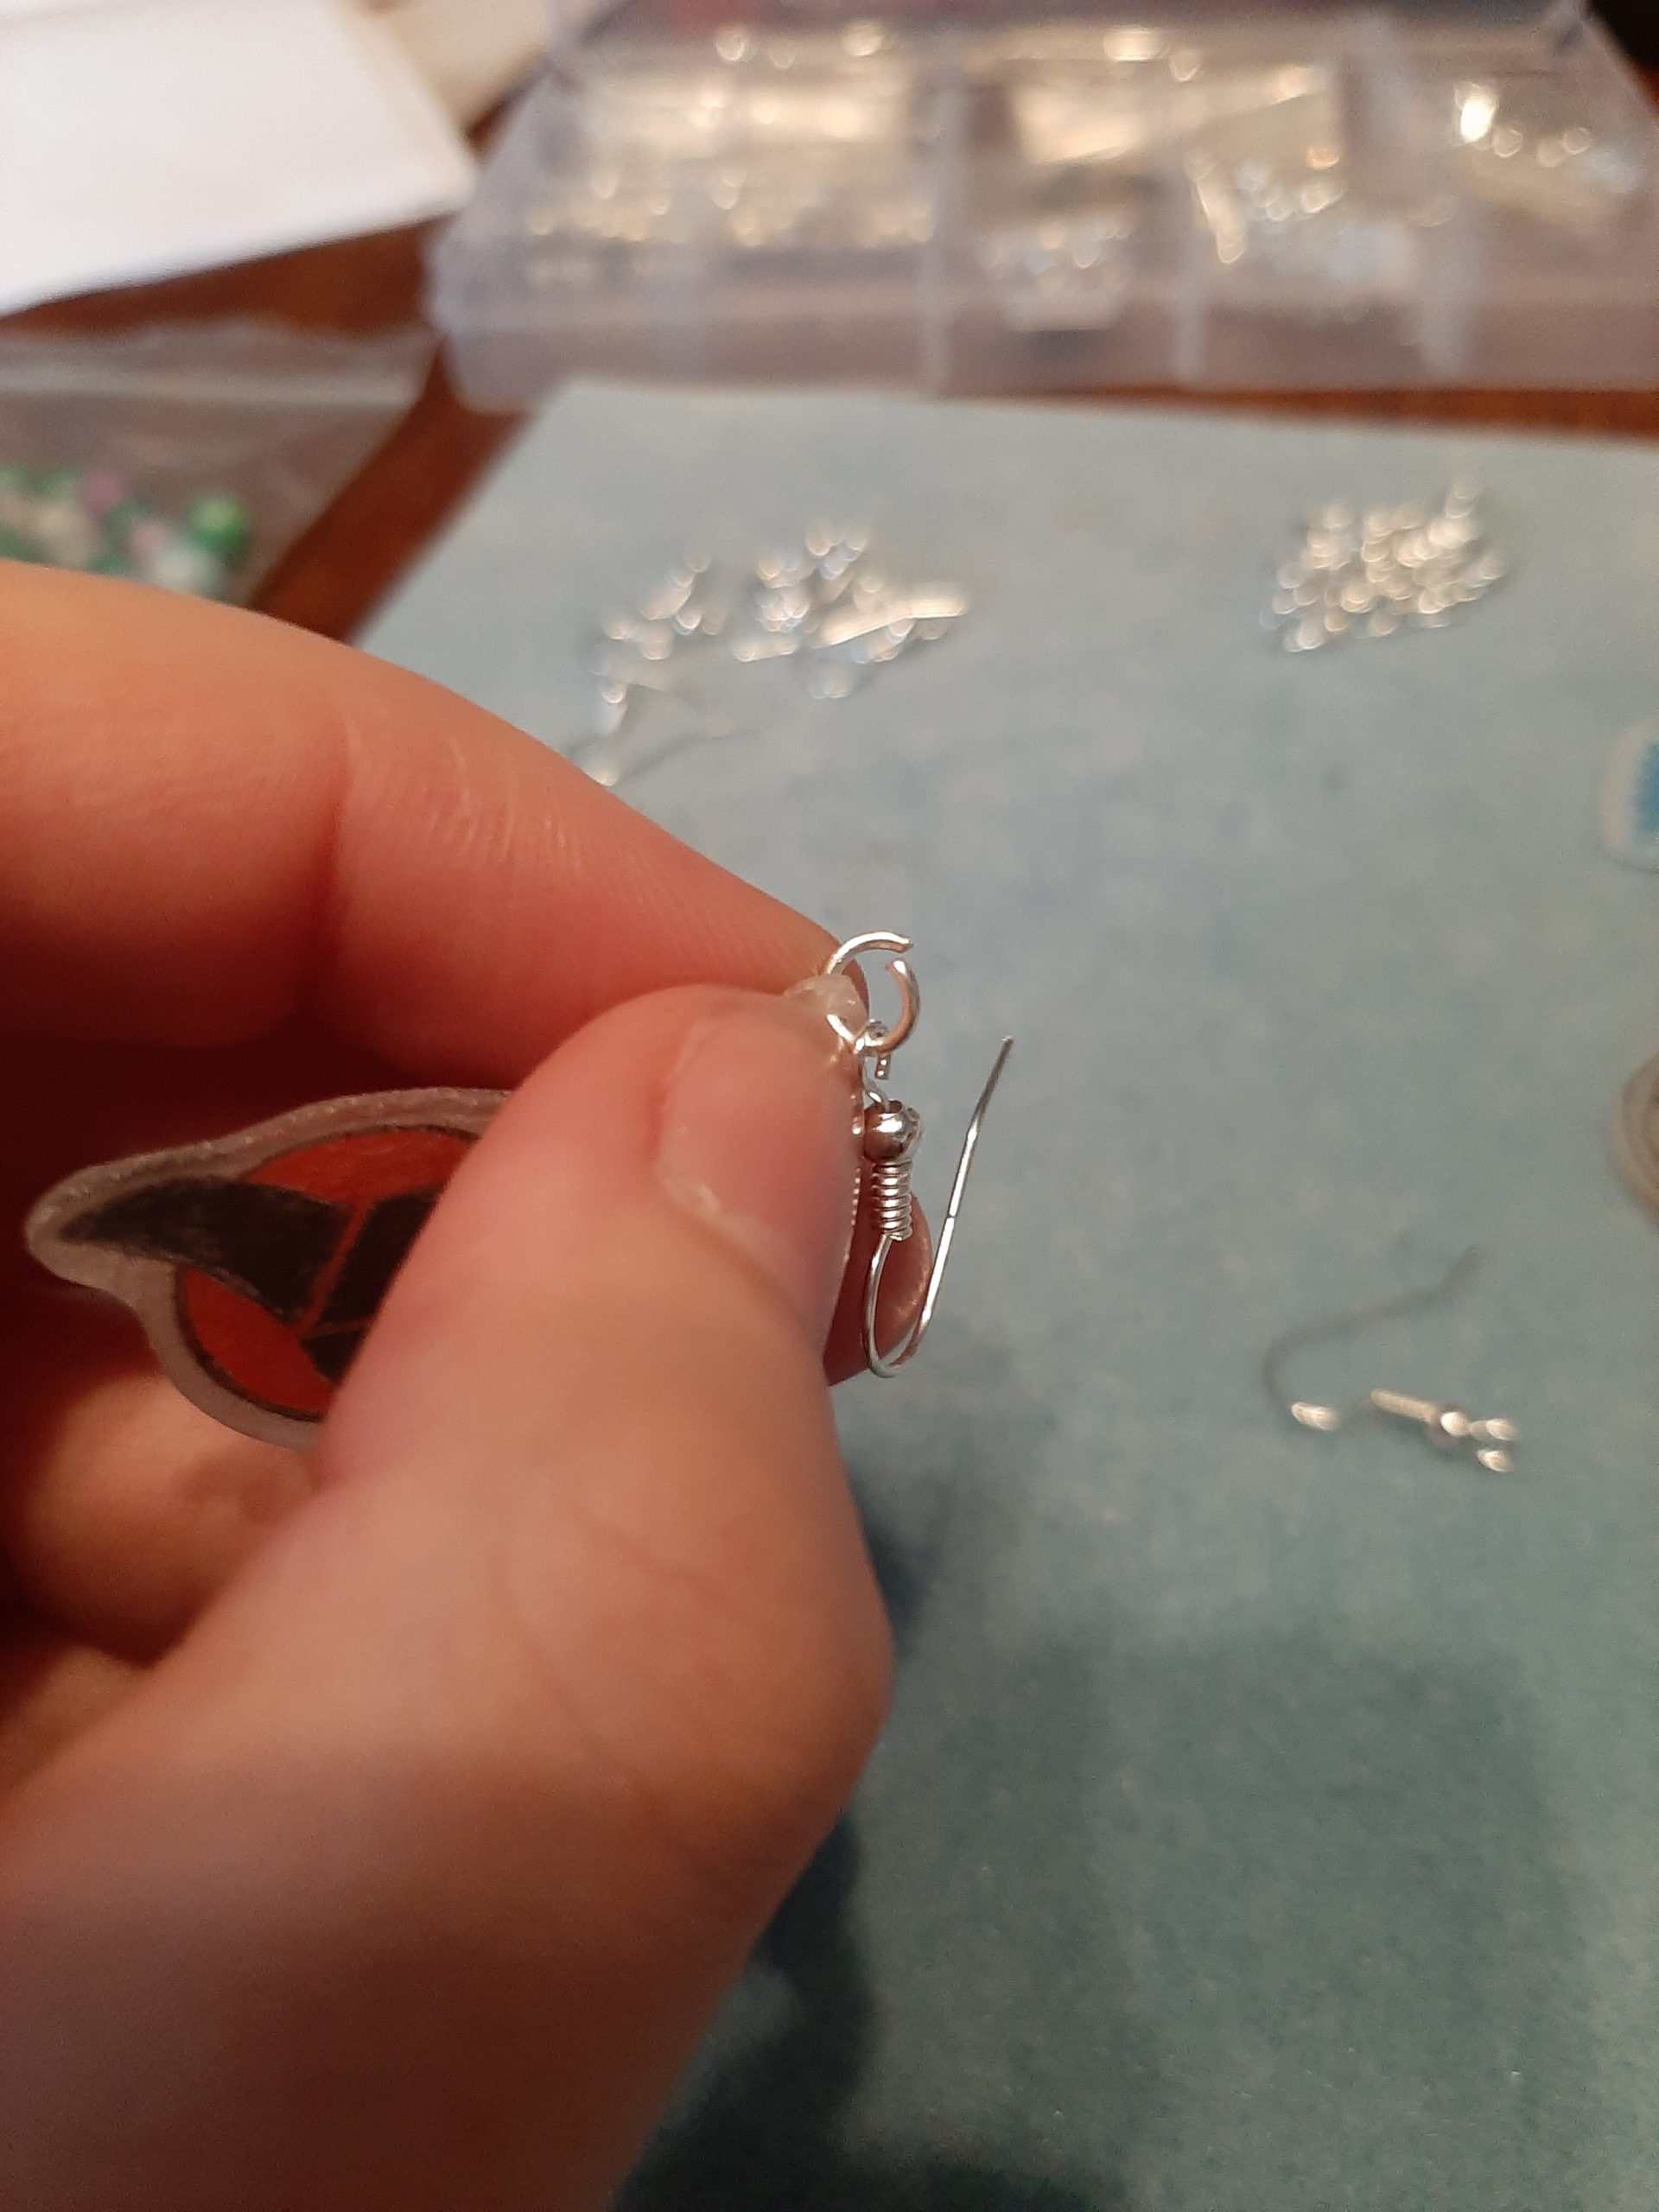
Step one for the earrings is to open a jump ring with your pliers. If you have two sets of pliers you can hold either side of the break and gently twist in opposite directions, but it’s doable with one. Once you have the jump ring open, slip your earring into it, and then slip a hook ear wire in. Close the jump ring with your pliers, then repeat the above steps with your second earring.
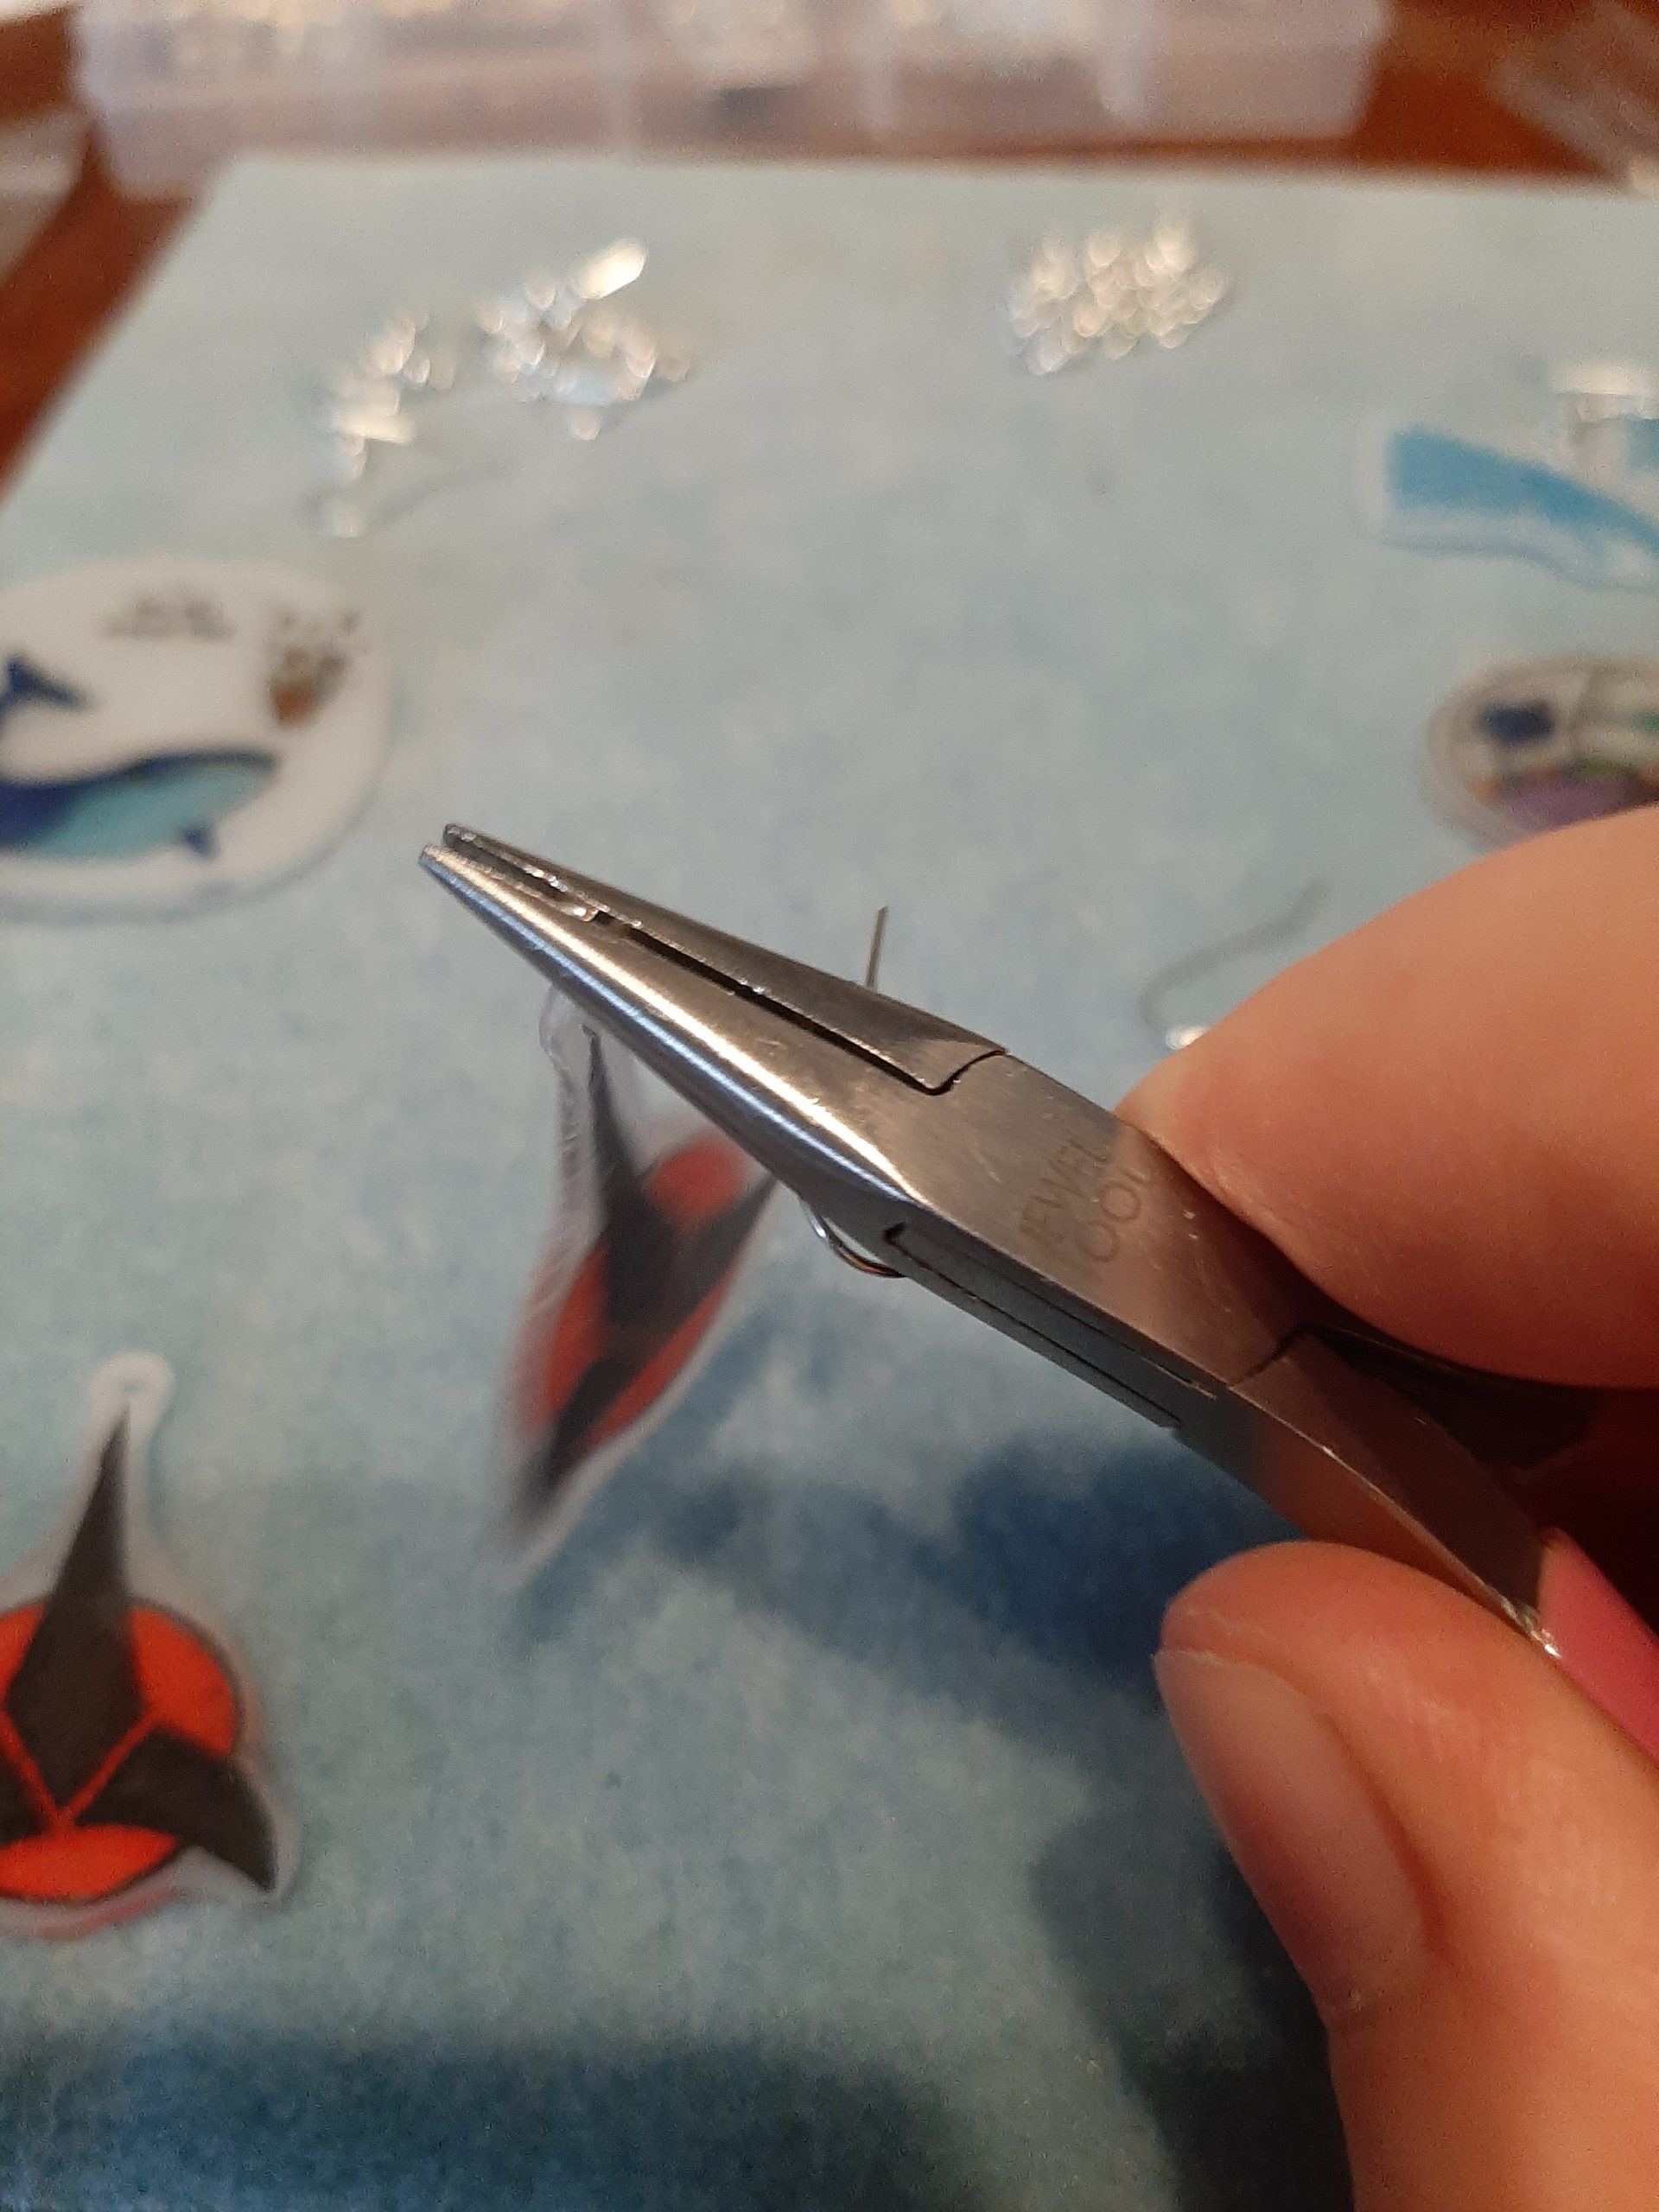
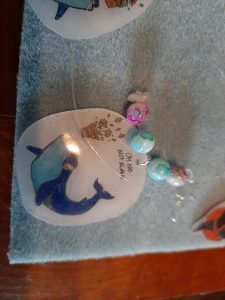
For a necklace the process will be similar. Open a jump ring with your pliers, then fit it through the punch hole you made in the plastic and close. Then thread your cord through. I recommend holding the necklace up to you in front of a mirror to see what length you want it to be. Once you’ve cut it to size, add any beading you like. You could add some crimps on either side if you have them. To do this, thread one at a time, hold it in place with your pliers, and close the pliers firmly over the crimp squashing it flat. Don’t worry if you don’t have crimps, the weight of the beads will help keep the shrink plastic in place when you’re wearing the necklace.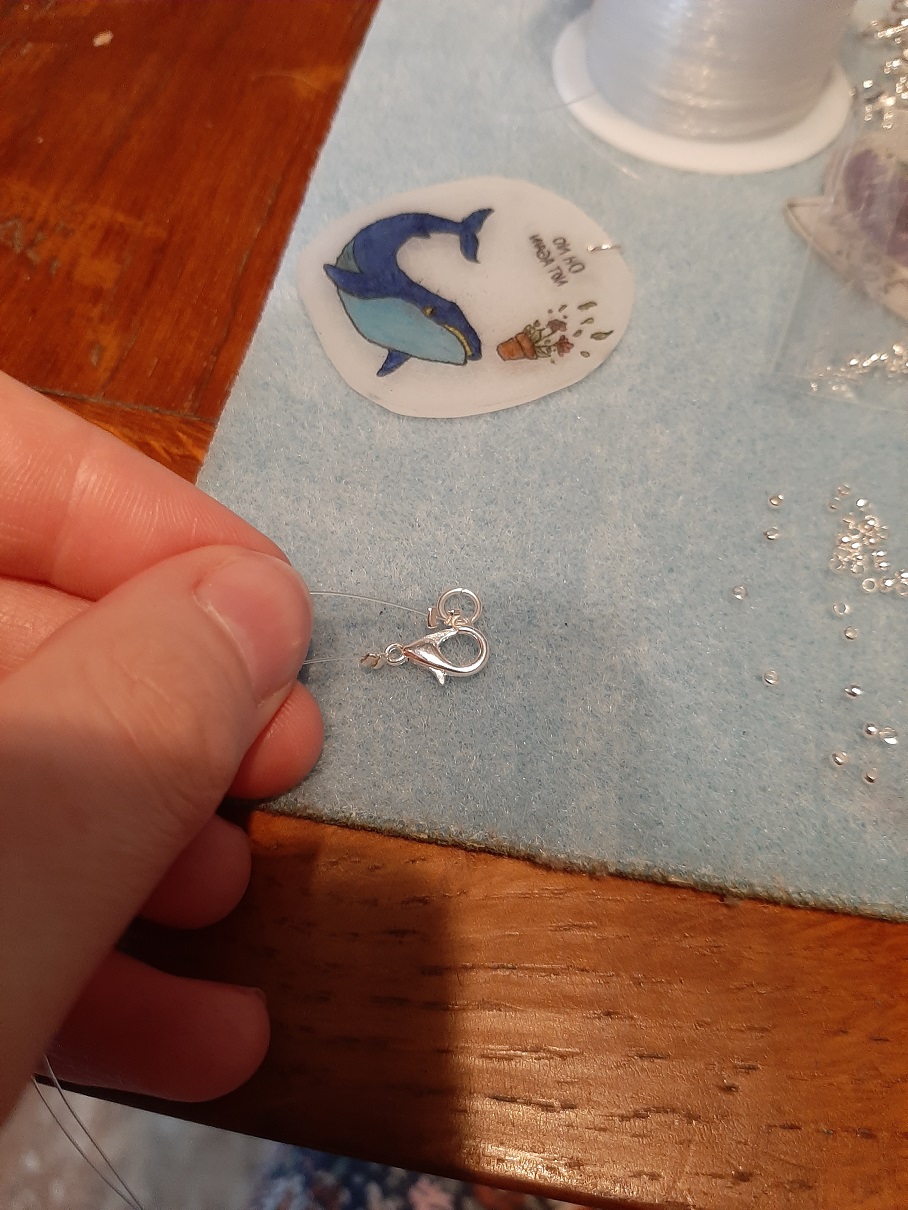
Finally, tie a jump ring on one end and a lobster clasp on the other. If you have crimps, you can place two crimps, flatten the first one, tie the lobster clasp, and feed your thread back into the second crimp before flattening it and cutting any excess thread. Again, this is entirely optional!
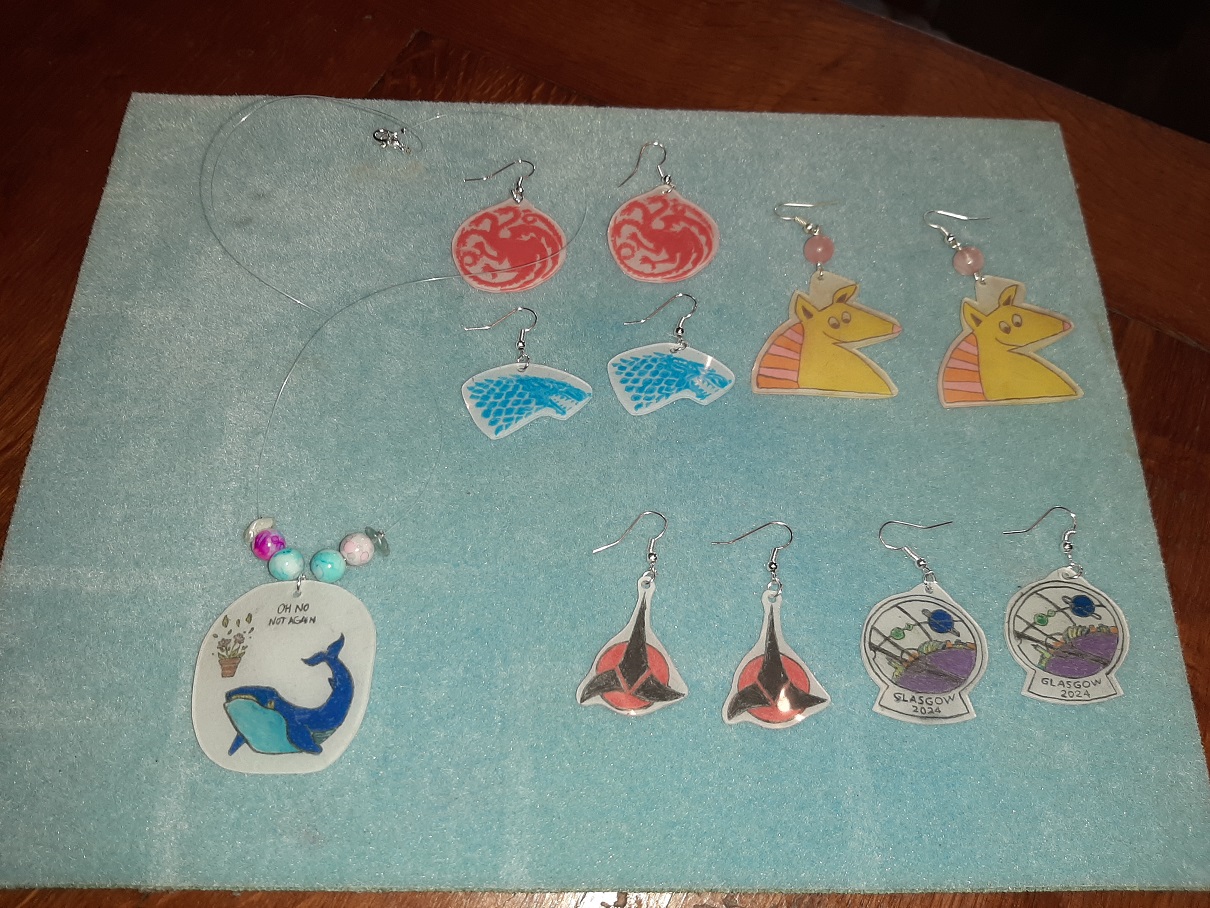
Here’s what it all looked like once I was done:
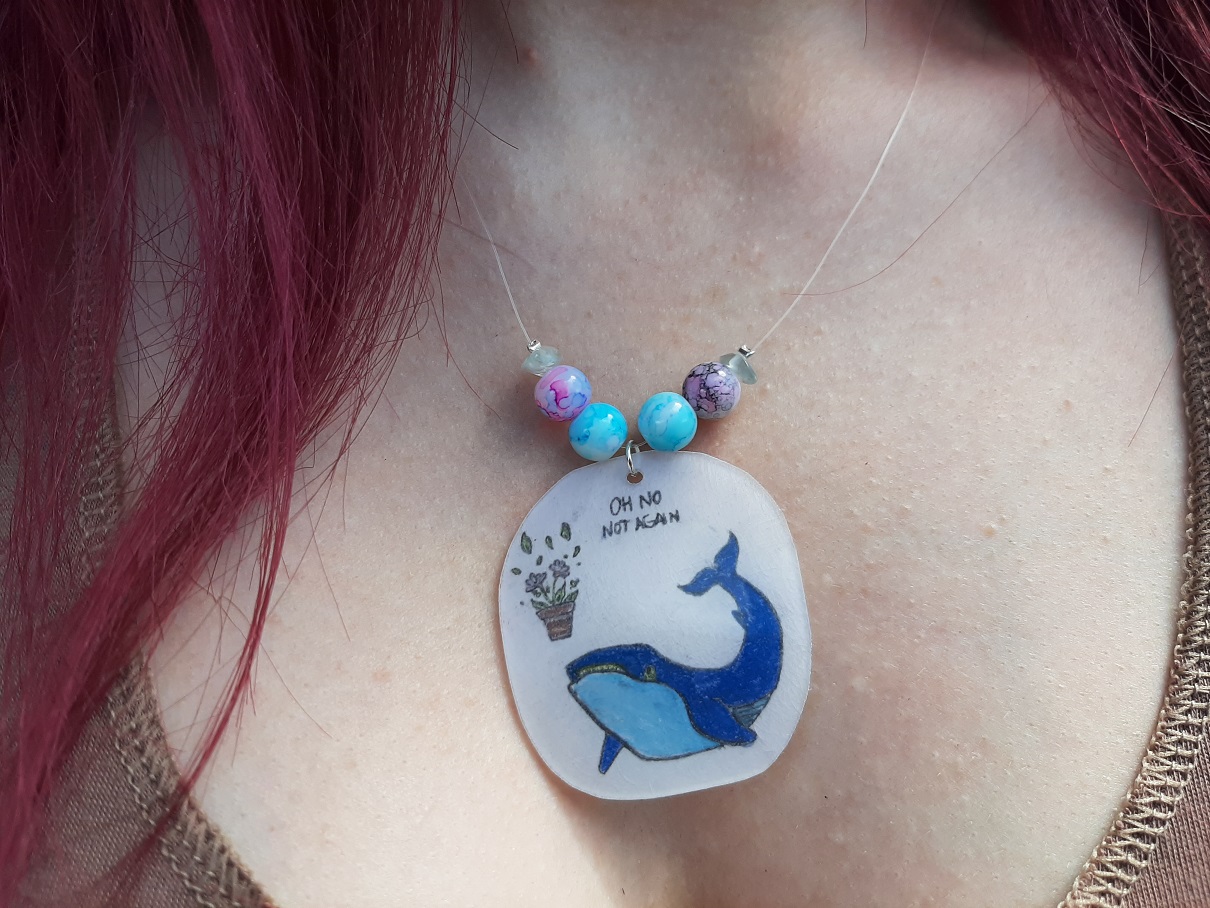
And here’s what the necklace looked like on!
If any of you decide to try this at home we would love to see what you come up with so please share! Our Twitter handle is @GlasgowIn2024
This article was brought to you by Caoileann O’Mahony, Craft Team in Promotions Glasgow in 2024.
We are the Bid Team for Glasgow in 2024 – A Worldcon for Our Futures. We are part of the vibrant Worldcon community. We would love to welcome you to Glasgow and the Armadillo Auditorium for the 2024 Hugo Awards. Please consider supporting us.